Apache NuttX RTOS + Ox64 BL808 SBC
📝 1 Jan 2024

Blissful New 12 months! 2024 is right here and we’re operating Apache NuttX RTOS (Actual-Time Working System) on Single-Board Computer systems with loads of RAM…
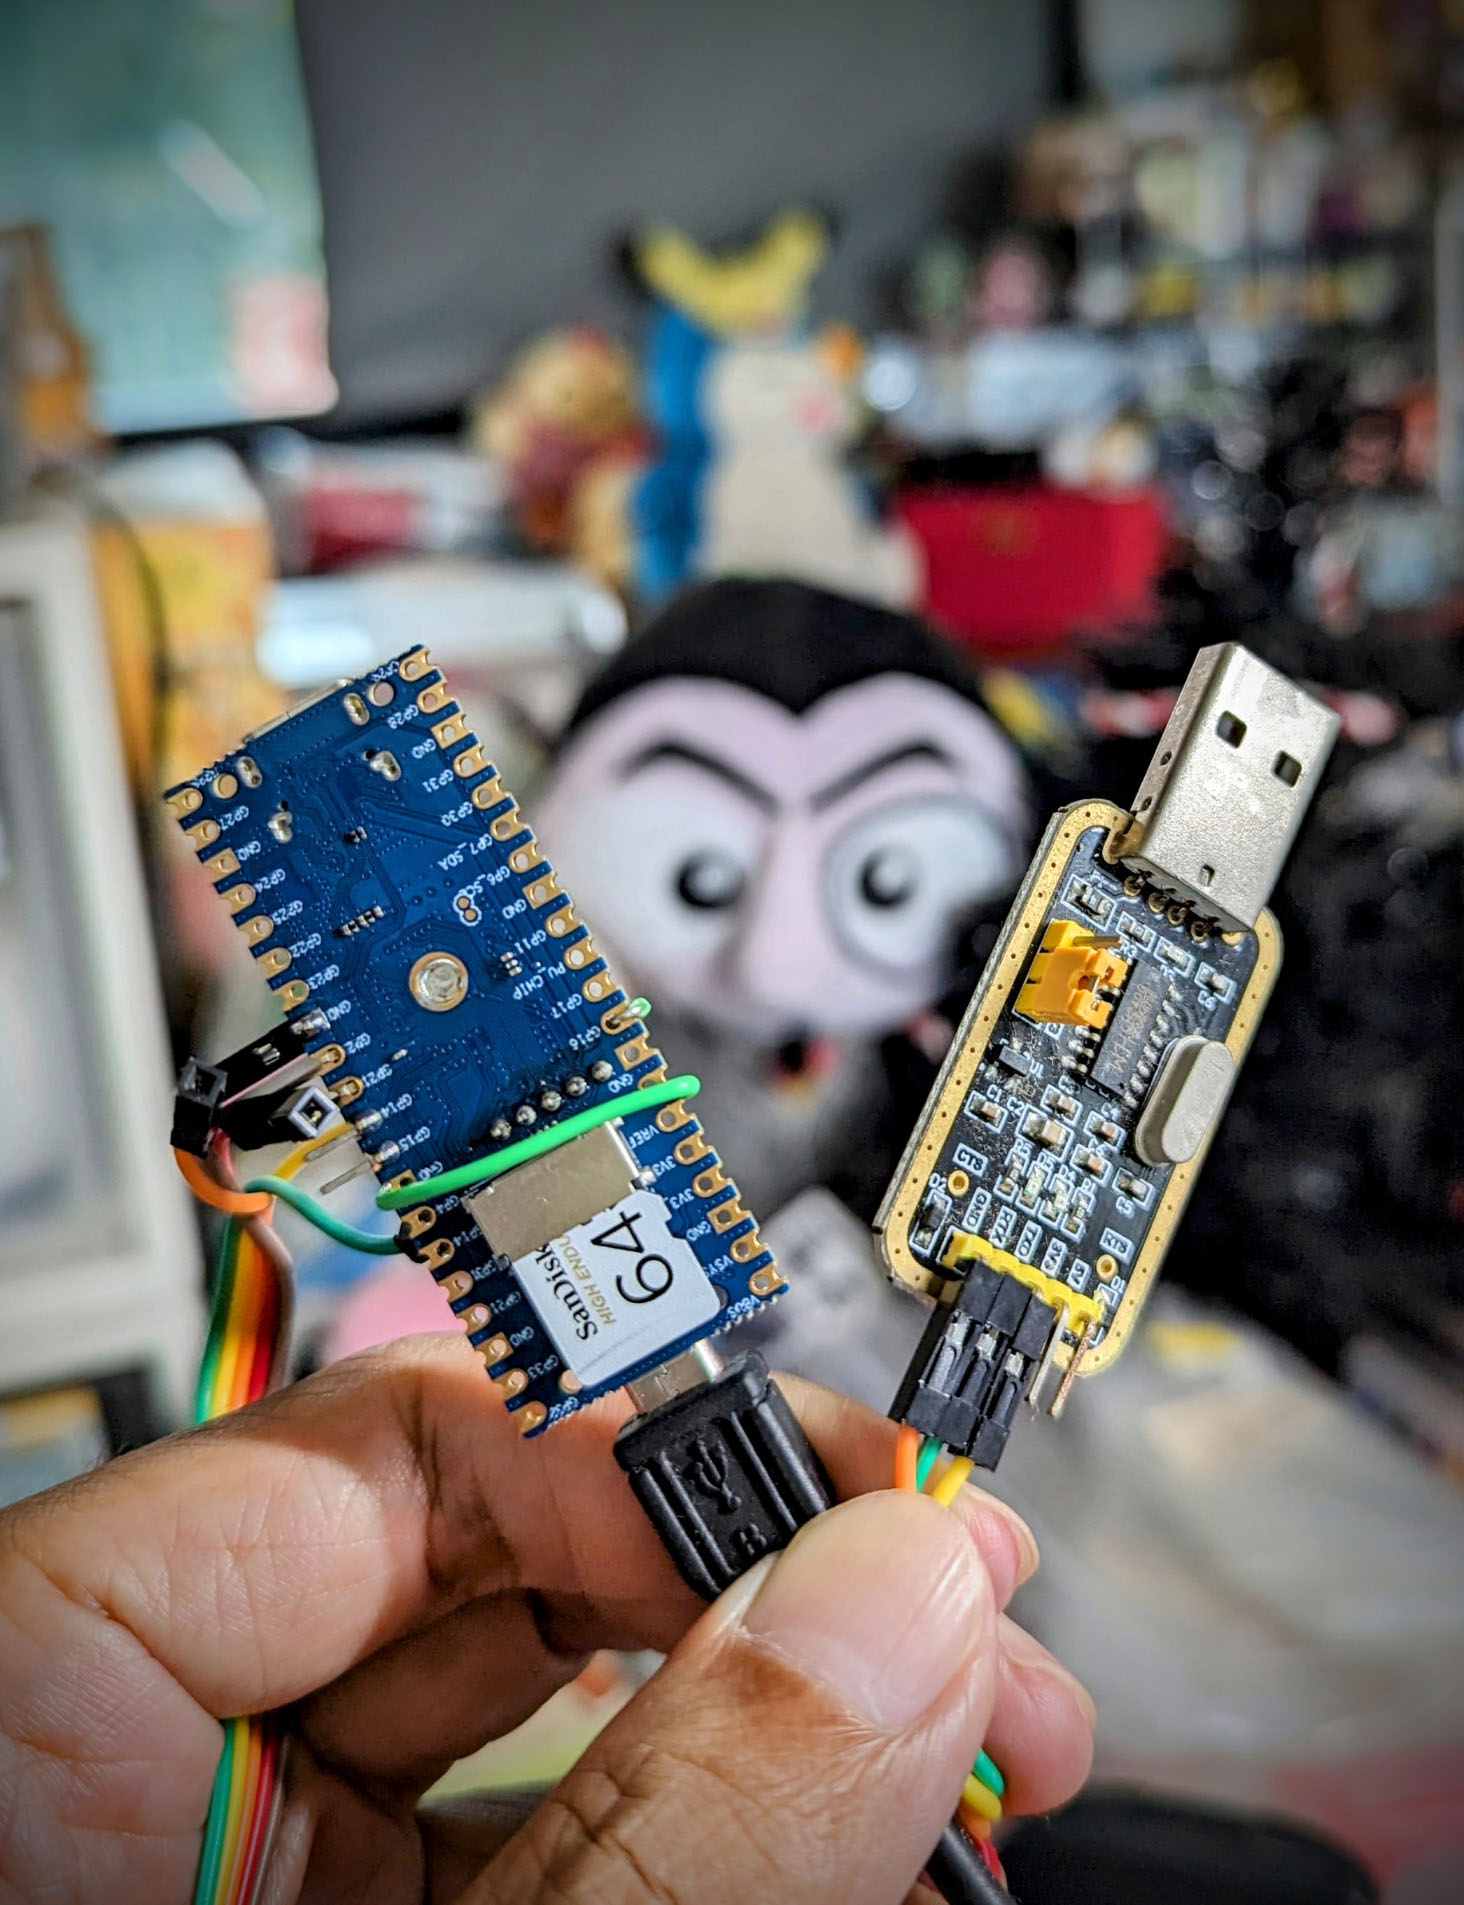
Like Pine64 Ox64 BL808 RISC-V SBC with 64 MB RAM! (Pic under)
How will we use the Plentiful RAM?
On this article, we create a Blinky LED app with a Trendy, Rubbish-Collected Language: Nim Programming Language.
Garbage-Collected Languages (like Nim) require a bit more RAM than Low-Stage Languages (like C). Good for our roomy (and vroomy) SBC!
However we’d like a RISC-V SBC?
No worries! We’ll run Nim + NuttX on the QEMU Emulator for 64-bit RISC-V. Which works nice on Linux, macOS and Home windows machines.
The whole lot that occurs on Ox64 SBC, we’ll see the very same factor in QEMU!
Hmmm Rubbish Assortment… Received’t it jitter: run-pause-run-pause?
The superb of us at Wilderness Labs are operating .NET on NuttX with Rubbish Assortment. Optimising for performance actually helps!
How is Nim completely different from Rust and Zig?
We’ve examined Rust on NuttX and Zig on NuttX. Nim is completely different as a result of it…
-
Compiles to C (as an alternative of Machine Code)
-
Syntax is Python-like (however Statically Compiled)
-
Automated Rubbish Assortment (no Borrow Checker)
-
And it’s Memory Safe (like Rust)
First we are saying hey to Nim…

(3 languages in a title heh heh)
That is the easiest Nim Program that can run on NuttX: hello_nim_async.nim
## Predominant Operate in Nim.
## Will likely be referred to as by NuttX, so we export to C.
proc hello_nim() {.exportc, cdecl.} =

  ## Print one thing
  echo "Whats up Nim!"

  ## Power the Rubbish Assortment
  GC_runOrc()
Which appears loads like Python!
What’s GC_runOrc?
Our Nim Program will likely be referred to as by C. (Bear in mind NuttX?)
And Nim works with Garbage Collection. Thus we name GC_runOrc to…
-
Power the Rubbish Assortment to finish
-
Clear up all remaining Nim Objects
-
Then return to C and NuttX
What if we neglect to name GC_runOrc?
Erm don’t! To make it unforgettable, we defer the Rubbish Assortment: hello_nim_async.nim
## Predominant Operate in Nim
proc hello_nim() {.exportc, cdecl.} =

  ## On Return: Power the Rubbish Assortment
  defer: GC_runOrc()

  ## Print one thing
  echo "Whats up Nim!"
defer ensures that the Rubbish Assortment will at all times occur, as quickly as we return from the Predominant Operate.
Now we do one thing cool and enlightening…
(hello_nim is named by our C Program hello_nim_main.c)

That is how we blink an LED with Nim on NuttX: hello_nim_async.nim
## Blink the LED
proc blink_led() =

  ## Open the LED Driver
  echo "Opening /dev/userleds"
  let fd = c_open("/dev/userleds", O_WRONLY)

  ## Examine the File Descriptor for error
  if fd < 0:
    echo "Did not open /dev/userleds"
    return
First we name the NuttX Operate open to entry the LED Driver.
We’d neglect to shut the LED Driver (in case of error), so we defer the closing…
  ## On Return: Shut the LED Driver
  defer: c_close(fd)
Subsequent we name the NuttX Operate ioctl to flip LED 0 to On…
  ## Activate LED
  echo "Set LED 0 to 1"
  var ret = c_ioctl(fd, ULEDIOC_SETALL, 1)
  if ret < 0:
    echo "ioctl(ULEDIOC_SETALL) failed"
    return
ULEDIOC_SETALL accepts a Bit Masks of LED States. The worth 1 says that LED 0 (Bit 0) will likely be flipped On.
(Different LEDs will likely be flipped Off)
We pause some time…
  ## Wait a second (actually)
  ## As a result of 1 million microseconds = 1 second
  echo "Ready..."
  c_usleep(1000_000)
Lastly we flip LED 0 to Off…
  ## Flip off LED
  echo "Set LED 0 to 0"
  ret = c_ioctl(fd, ULEDIOC_SETALL, 0)
  if ret < 0:
    echo "ioctl(ULEDIOC_SETALL) failed"
    return

  ## Wait once more
  echo "Ready..."
  c_usleep(1000_000)
In our Main Function: We name the above perform 20 occasions to blink our LED (pic under)…
## Predominant Operate in Nim
proc hello_nim() {.exportc, cdecl.} =

  ## On Return: Power the Rubbish Assortment
  defer: GC_runOrc()

  ## Blink the LED 20 occasions
  for loop in 0..19:
    blink_led()
(Looks mighty similar to the C Version)
And we’re nearly achieved! Nim wants to find our NuttX Features…

How will Nim find out about open, shut, ioctl, usleep?
We import the NuttX Features from C into Nim: hello_nim_async.nim
## Import NuttX Features from C.
## Based mostly on https://github.com/nim-lang/Nim/blob/devel/lib/std/syncio.nim

proc c_open(filename: cstring, mode: cint): cint {.
  importc: "open",
  header: "<fcntl.h>".}

proc c_close(fd: cint): cint {.
  importc: "shut",
  header: "<fcntl.h>",
  discardable.}

proc c_ioctl(fd: cint, request: cint): cint {.
  importc: "ioctl",
  header: "<sys/ioctl.h>",
  varargs.}

proc c_usleep(usec: cuint): cint {.
  importc: "usleep",
  header: "<unistd.h>",
  discardable.}
(discardable tells Nim Compiler that the Return Value is Optional)
We do the identical for NuttX Macros…
## Import NuttX Macros from C.
## Based mostly on https://github.com/nim-lang/Nim/blob/devel/lib/std/syncio.nim

var O_WRONLY {.
  importc: "O_WRONLY",
  header: "<fcntl.h>".}: cint

var ULEDIOC_SETALL {.
  importc: "ULEDIOC_SETALL",
  header: "<nuttx/leds/userled.h>".}: cint
We’re able to run this!

Find out how to run Nim Blinky on QEMU Emulator?
We start by booting NuttX RTOS on RISC-V QEMU Emulator (64-bit)…
-
Set up QEMU Emulator for RISC-V (64-bit)…
## For macOS: brew set up qemu ## For Debian and Ubuntu: sudo apt set up qemu-system-riscv64 -
Obtain
nuttxfrom the NuttX Release…nuttx: NuttX Image for 64-bit RISC-V QEMU
If we choose to construct NuttX ourselves: Follow these steps
-
Begin the QEMU RISC-V Emulator (64-bit) with NuttX RTOS…
qemu-system-riscv64 -semihosting -M virt,aclint=on -cpu rv64 -smp 8 -bios none -kernel nuttx -nographic -
NuttX is now operating within the QEMU Emulator! (Pic above)
NuttShell (NSH) NuttX-12.0.3 nsh> -
On the NuttX Immediate, enter “hello_nim”…
nsh> hello_nim Whats up Nim! Opening /dev/userleds -
Nim on NuttX blinks our Simulated LED…
Set LED 0 to 1 board_userled_all: led=0, val=1 Ready... Set LED 0 to 0 board_userled_all: led=0, val=0 Ready... Set LED 0 to 1 board_userled_all: led=0, val=1 Ready... -
To Exit QEMU: Press
Ctrl-Athenx
Now we step out from the Digital World into the Actual World (like “The Matrix”)…

Will Nim Blinky run on an actual RISC-V SBC?
Yep! Join an LED to Ox64 SBC at GPIO 29, Pin 21 (pic above)…
| Join | To | Wire |
|---|---|---|
| Ox64 Pin 21 (GPIO 29) |
Resistor (47 Ohm) |
Pink |
| Resistor (47 Ohm) |
LED + (Curved Edge) |
Breadboard |
| LED – (Flat Edge) |
Ox64 Pin 23 (GND) |
Black |
(Resistor is 47 Ohm, yellow-purple-black-gold, nearly Karma Chameleon)
Observe these steps to boot NuttX RTOS on our Ox64 BL808 SBC…
-
Flash OpenSBI and U-Boot Bootloader to Ox64
-
Put together a Linux microSD for Ox64 as described in the previous article
-
Obtain
Picturefrom the NuttX Release…Image: NuttX Image for Ox64 BL808 SBC
If we choose to construct NuttX ourselves: Follow these steps
-
Copy the
Picturefile and overwrite thePicturewithin the Linux microSD -
Insert the microSD into Ox64 and energy up Ox64
-
NuttX is now operating on our Ox64 SBC! (Pic under)
Beginning kernel... NuttShell (NSH) NuttX-12.0.3 nsh> -
On the NuttX Immediate, enter “hello_nim”…
nsh> hello_nim Whats up Nim! Opening /dev/userleds -
Nim on NuttX blinks our LED…
Set LED 0 to 1
board_userled_all: led=0, val=1
Ready...

Set LED 0 to 0
board_userled_all: led=0, val=0
Ready...

Set LED 0 to 1
board_userled_all: led=0, val=1
Ready...
Nim blinks an actual LED on an actual RISC-V SBC! Let’s determine the way it works…
Nim runs extremely nicely on NuttX. How is that doable?
That’s as a result of Nim compiles to C. So far as NuttX is anxious…
Nim appears like every other C Program!
Whoa! How is Nim compiled to C?
Our NuttX Makefile calls the Nim Compiler…
## Compile Nim to C
export TOPDIR=$PWD/nuttx
cd apps/examples/hello_nim
nim c --header hello_nim_async.nim
Nim Compiler compiles our Nim Program…
## Nim Program that prints one thing
proc hello_nim() {.exportc, cdecl.} =
  echo "Whats up Nim!"
Into this C Program…
// Predominant Operate compiled from Nim to C:
// echo "Whats up Nim!"
N_LIB_PRIVATE N_CDECL(void, hello_nim)(void) {
  ...
  // `echo` comes from the Nim System Library
  // https://github.com/nim-lang/Nim/blob/devel/lib/system.nim#L2849-L2902
  echoBinSafe(TM__1vqzGCGyH8jPEpAwiaNwvg_2, 1);
  ...
}

// String "Whats up Nim!" compiled from Nim to C
static NIM_CONST tyArray__nHXaesL0DJZHyVS07ARPRA TM__1vqzGCGyH8jPEpAwiaNwvg_2
  = {{10, (NimStrPayload*)&TM__1vqzGCGyH8jPEpAwiaNwvg_3}};

// Precise String for "Whats up Nim!"
static const struct { NI cap; NIM_CHAR information[10+1]; } TM__1vqzGCGyH8jPEpAwiaNwvg_3
  =  NIM_STRLIT_FLAG, "Whats up Nim!" ;
(From .nimcache/@mhello_nim_async.nim.c)
Therefore Nim Compiler has produced a perfectly valid C Program. That can compile with any C Compiler!
How will NuttX compile this?
Nim Compiler generates the code above into the .nimcache folder.
Our NuttX Makefile compiles all the things inside .nimcache with the GCC Compiler…
## Compile all the things within the .nimcache folder
NIMPATH = $(shell choosenim present path)
CFLAGS += -I $(NIMPATH)/lib -I ../../.nimcache
CSRCS  += $(wildcard ../../.nimcache/*.c)
And hyperlinks the Nim Modules (compiled by GCC) into NuttX.
So Nim Compiler is conscious of NuttX?
Yep! Nim Compiler is internally wired to produce NuttX Code (that GCC will compile accurately)…
Kudos to centurysys and the Nim Group for making this doable!
The whole lot is hunky dory with Nim on NuttX?
We made some Minor Fixes, we’ll upstream to NuttX shortly…
Right here we see the Nim Compiler working completely, compiling our program for NuttX (by parsing the NuttX Build Config)…
$ export TOPDIR=/workspaces/bookworm/nuttx
$ cd /workspaces/bookworm/apps/examples/hello_nim
$ nim c --header hello_nim_async.nim

read_config: /workspaces/bookworm/nuttx/.config
line=CONFIG_DEBUG_SYMBOLS=y
line=CONFIG_DEBUG_FULLOPT=y
line=CONFIG_ARCH="risc-v"
@["keyval=", "ARCH", ""risc-v""]
keyval[1]="risc-v"
line=CONFIG_RAM_SIZE=33554432
* arch:    riscv64
* decide:     oSize
* debug:   true
* ramSize: 33554432
* isSim:   false
Trace: used config file '/house/vscode/.choosenim/toolchains/nim-#devel/config/nim.cfg' [Conf]
Trace: used config file '/house/vscode/.choosenim/toolchains/nim-#devel/config/config.nims' [Conf]
Trace: used config file '/workspaces/bookworm/apps/config.nims' [Conf]
....................................................................................................................................
Trace: mm: orc; decide: measurement; choices: -d:hazard
92931 traces; 1.214s; 137.633MiB peakmem; proj: /workspaces/bookworm/apps/examples/hello_nim/hello_nim_async.nim; out: /workspaces/bookworm/apps/.nimcache/hello_nim_async.json [SuccessX]
Isn’t Nim presupposed to be Reminiscence Protected?
Yeah to date we’re doing Low-Stage Coding with NuttX. And the Nim Memory Safety doesn’t shine via.
Later once we write LVGL Graphical Apps in Nim, we’ll admire the safety and simplicity of Nim…

GPIO 29 in BL808 Reference Manual (Page 119)
Nim Blinky wants an LED Driver for Ox64…
What’s the Quickest Technique to create a NuttX LED Driver?
U-Boot Bootloader will help! Energy up Ox64 and press Enter a couple of occasions to disclose the U-Boot Command Immediate.
We enter these U-Boot Instructions…
## Dump the GPIO 29 Register at 0x20000938 (gpio_cfg29)
$ md 0x20000938 1
20000938: 00400803                             ..@.

## Set GPIO 29 Output to 1:
## (1 << 6) | (11 << 8) | (0 << 30) | (0 << 4) | (1 << 24)
## = 0x1000b40
$ mw 0x20000938 0x1000b40 1

## Dump the GPIO 29 Register to confirm
$ md 020000938 1
20000938: 01000b40                             @...

## Set GPIO 29 Output to 0:
## (1 << 6) | (11 << 8) | (0 << 30) | (0 << 4) | (0 << 24)
## = 0xb40
$ mw 0x20000938 0xb40 1

## Dump the GPIO 29 Register to confirm
$ md 0x20000938 1
20000938: 00000b40                             @...
And our LED (GPIO 29) will flip On and Off!
Thus we have now verified the Magic Bits for flipping our LED…
-
Write to GPIO 29 Register at
0x20000938(gpio_cfg29) -
Register Worth
0x1000B40will flip the LED On -
Register Worth
0xB40will flip the LED Off
How did we determine the Magic Bits for GPIO 29?
From BL808 Reference Manual (Web page 56), “Regular GPIO Output Mode”…
-
Set reg_gpio_29_oe (Bit 6) to
1to allow GPIO Output Mode
= (1 << 6) -
Set reg_gpio_29_func_sel (Bits 8 to 12) to
11to enter SWGPIO Mode
= (11 << 8) -
Set reg_gpio_29_mode (Bits 30 to 31) to
0to allow Regular Output Operate of I/O
= (0 << 30) -
Set reg_gpio_29_pu (Bit 4) and reg_gpio_29_pd (Bit 5) to
0to disable Inside Pull-Up and Pull-Down features
= (0 << 4) -
Set the Pin Stage (
0or1) via reg_gpio_29_o (Bit 24)
= Both (0 << 24) Or (1 << 24)

(GPIO Bits are listed in the pic above)
Which suggests…
And we write the above values to GPIO 29 Register at 0x2000 0938 (gpio_cfg29)
Find out how to flip the GPIO in our LED Driver?
We do that in our NuttX LED Driver: bl808_userleds.c
// Flip the LEDs On and Off in response to the LED Set
// (Bit 0 = LED 0)
void board_userled_all(uint32_t ledset) {

  // For LED 0 to 2...
  for (int i = 0; i < BOARD_LEDS; i++) {

    // Get the specified state of the LED
    const bool val = ((ledset & g_led_setmap[i]) != 0);

    // If that is LED 0...
    if (i == 0) {

      // Flip it On or Off?
      if (val)  (11 << 8)  else  (0 << 4)
    }
  }
}
That’s how we created a barebones LED Driver for Ox64!
(Remember to add the Auto LED Driver)
(And update the Board Kconfig)
Ahem it appears slightly messy…
No Worries! Later we’ll change the (terrible) code above by the BL808 GPIO Driver. Which we’ll copy from NuttX for BL602…
// Get the specified state of LED[i]
const bool val = ((ledset & g_led_setmap[i]) != 0);

// Name the BL808 GPIO Driver to flip the LED On or Off
bl808_gpio_write(  // Write to the GPIO Output...
  g_led_map[i],    // GPIO Quantity for LED[i]
  val              // Flip it On or Off
);
Anything we patched?
We mounted the NuttX Timer for Ox64 (in any other case we will’t blink)…

Immediately we ran some Enjoyable Experiments with Nim on NuttX…
-
We blinked a Simulated LED on QEMU Emulator
-
Then we blinked a Actual LED on Ox64 BL808 RISC-V SBC (pic above)
-
We peeked inside Nim on NuttX
-
To determine how Nim compiles to C
-
Regardless that it’s Python-like with Rubbish Assortment
-
And The whole lot works OK!
(With minor fixes to Nim Config, LED Driver and RISC-V Timer)
We’ll do extra with Nim on NuttX. (Possibly LVGL?) Keep Tuned!
Many Due to my GitHub Sponsors (and the superior NuttX Group) for supporting my work! This text wouldn’t have been doable with out your assist.
Obtained a query, remark or suggestion? Create an Situation or submit a Pull Request right here…
On this article, we compiled a Work-In-Progress Model of Apache NuttX RTOS for QEMU RISC-V (64-bit) that has Minor Fixes for Nim…
First we set up Nim Compiler (solely the Newest Dev Model helps NuttX)…
## Set up Nim Compiler: https://nim-lang.org/install_unix.html
curl https://nim-lang.org/choosenim/init.sh -sSf | sh

## Add Nim to PATH
export PATH=$HOME/.nimble/bin:$PATH

## Choose Newest Dev Model of Nim. Will take some time!
choosenim devel --latest

## Model ought to be 2.1.1 or later:
## Nim Compiler Model 2.1.1 [Linux: amd64]
## Compiled at 2023-12-22
nim -v
(Nim won’t install? Try a Linux Container)
Then we obtain and construct NuttX for QEMU RISC-V (64-bit)…
## Obtain the WIP NuttX Supply Code
git clone
  --branch nim
  https://github.com/lupyuen2/wip-pinephone-nuttx
  nuttx
git clone
  --branch nim
  https://github.com/lupyuen2/wip-pinephone-nuttx-apps
  apps

## Configure NuttX for QEMU RISC-V (64-bit)
cd nuttx
instruments/configure.sh rv-virt:nsh64

## Construct NuttX
make

## Dump the disassembly to nuttx.S
riscv64-unknown-elf-objdump
  --syms --source --reloc --demangle --line-numbers --wide
  --debugging
  nuttx
  >nuttx.S
  2>&1
(Remember to install the Build Prerequisites and Toolchain)
This produces the NuttX ELF Picture nuttx that we could boot on QEMU RISC-V Emulator…
## Begin the QEMU RISC-V Emulator (64-bit) with NuttX RTOS
qemu-system-riscv64
  -semihosting
  -M virt,aclint=on
  -cpu rv64
  -smp 8
  -bios none
  -kernel nuttx
  -nographic
On the NuttX Immediate, enter “hello_nim”…
nsh> hello_nim
Whats up Nim!
Opening /dev/userleds
(Enter “help” to see the available commands)
Nim on NuttX blinks our Simulated LED…
Set LED 0 to 1
board_userled_all: led=0, val=1
Ready...

Set LED 0 to 0
board_userled_all: led=0, val=0
Ready...

Set LED 0 to 1
board_userled_all: led=0, val=1
Ready...
To Exit QEMU: Press Ctrl-A then x
On this article, we compiled a Work-In-Progress Model of Apache NuttX RTOS for Ox64 that has Minor Fixes for Nim…
First we set up Nim Compiler (solely the Newest Dev Model helps NuttX)…
## Set up Nim Compiler: https://nim-lang.org/install_unix.html
curl https://nim-lang.org/choosenim/init.sh -sSf | sh

## Add Nim to PATH
export PATH=$HOME/.nimble/bin:$PATH

## Choose Newest Dev Model of Nim. Will take some time!
choosenim devel --latest

## Model ought to be 2.1.1 or later:
## Nim Compiler Model 2.1.1 [Linux: amd64]
## Compiled at 2023-12-22
nim -v
(Nim won’t install? Try a Linux Container)
Then we obtain and construct NuttX for Ox64 BL808 SBC…
## Obtain the WIP NuttX Supply Code
git clone
  --branch nim
  https://github.com/lupyuen2/wip-pinephone-nuttx
  nuttx
git clone
  --branch nim
  https://github.com/lupyuen2/wip-pinephone-nuttx-apps
  apps

## Configure NuttX for Ox64 BL808 RISC-V SBC
cd nuttx
instruments/configure.sh ox64:nsh

## Construct NuttX
make

## Export the NuttX Kernel
## to `nuttx.bin`
riscv64-unknown-elf-objcopy
  -O binary
  nuttx
  nuttx.bin

## Dump the disassembly to nuttx.S
riscv64-unknown-elf-objdump
  --syms --source --reloc --demangle --line-numbers --wide
  --debugging
  nuttx
  >nuttx.S
  2>&1

## Dump the hello_nim disassembly to hello_nim.S
riscv64-unknown-elf-objdump
  --syms --source --reloc --demangle --line-numbers --wide
  --debugging
  ../apps/bin/hello_nim
  >hello_nim.S
  2>&1
(Remember to install the Build Prerequisites and Toolchain)
We construct the Preliminary RAM Disk that comprises NuttX Shell and NuttX Apps…
## Construct the Apps Filesystem
make -j 8 export
pushd ../apps
./instruments/mkimport.sh -z -x ../nuttx/nuttx-export-*.tar.gz
make -j 8 import
popd

## Generate the Preliminary RAM Disk `initrd`
## in ROMFS Filesystem Format
## from the Apps Filesystem `../apps/bin`
## and label it `NuttXBootVol`
genromfs
  -f initrd
  -d ../apps/bin
  -V "NuttXBootVol"

## Put together a Padding with 64 KB of zeroes
head -c 65536 /dev/zero >/tmp/nuttx.pad

## Append Padding and Preliminary RAM Disk to NuttX Kernel
cat nuttx.bin /tmp/nuttx.pad initrd
  >Picture
This produces the NuttX Picture for Ox64: Picture
Subsequent we put together a Linux microSD for Ox64 as described in the previous article.
(Remember to flash OpenSBI and U-Boot Bootloader)
And we do the Linux-To-NuttX Switcheroo: Copy the Picture file (from above) and overwrite the Picture within the Linux microSD…
## Overwrite the Linux Picture
## on Ox64 microSD
cp Picture
  "/Volumes/NO NAME/Picture"
diskutil unmountDisk /dev/disk2
Insert the microSD into Ox64 and energy up Ox64.
Ox64 boots OpenSBI, which begins U-Boot Bootloader, which begins NuttX Kernel and the NuttX Shell (NSH).
On the NuttX Immediate, enter “hello_nim”…
nsh> hello_nim
Whats up Nim!
Opening /dev/userleds

Set LED 0 to 1
board_userled_all: led=0, val=1
Ready...

Set LED 0 to 0
board_userled_all: led=0, val=0
Ready...
(Enter “help” to see the available commands)
Nim on NuttX blinks our LED.

The sleep command hangs in NuttX Shell. Find out how to repair it?
That’s as a result of we haven’t carried out the RISC-V Timer for Ox64! We should always name OpenSBI Supervisor Binary Interface to deal with the Timer…
We solely want to vary the Timer Initialisation: bl808_timerisr.c
// Timer Frequency
#outline MTIMER_FREQ 1000000

// This perform is named throughout start-up to initialize the timer interrupt.
void up_timer_initialize(void) {
  struct oneshot_lowerhalf_s *decrease = riscv_mtimer_initialize(
    0, 0, RISCV_IRQ_STIMER, MTIMER_FREQ);
  DEBUGASSERT(decrease);
  up_alarm_set_lowerhalf(decrease);
}
The way it works: At startup, up_timer_initialize (above) calls…
Initially we set MTIMER_FREQ to 10000000: bl808_timerisr.c
#outline MTIMER_FREQ 10000000
However this causes the command sleep 1 to pause for 10 seconds. So we divide the frequency by 10: bl808_timerisr.c
#outline MTIMER_FREQ 1000000
Now the sleep command works accurately in NuttX Shell! Right here’s the log (ignore the errors)…